
Description
X1-N-DJ to X1-K 6″2K Mono Screen Conversion Kit
This kit is only for X1-N-DJ to X1-K upgrade. X1-K essentially is an X1 with the latest mainboard, parallel light, and 6″ mono screen.
How to spot whether you have a new mainboard or not (X1-N):
The new mainboard’s access to the LCD screen socket is different from the previous mainboard. For this reason, new mainboard machines have a side window on the left side of the machine body. This is so that it is easy for you to insert the connector. But if your machine is X1 and has no such window, it is still possible to upgrade, just a bit hard to connect the LCD screen cable.
The good thing about the mono screen is that you don’t really need to replace LCD screen often. It can last a long time, as long as you don’t break/crush it with residues, etc.
If your model is different, here are the upgrade path:
The upgrade cost depends on the machine model you have.
**********************************************
X1(classic)
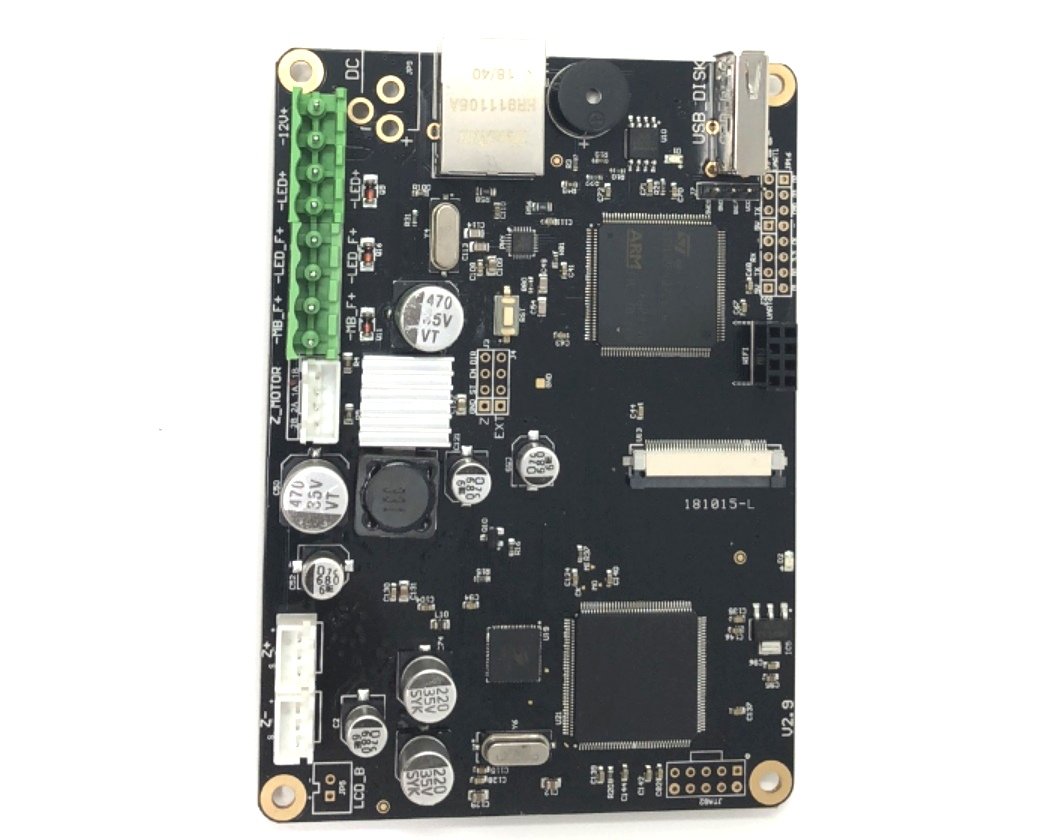
– X1-N Mainboard
– Aluminum Mid Plate
– Monochrome 6″ 050um Screen and its matching acrylic boardn
– Parallel LED Array and new mount brackets
**********************************************
X1-DJ(classic)
– X1-N Mainboard
– Aluminum Mid Plate
– Monochrome 6″ 050um Screen and its matching acrylic boardn
– New mount brackets for existing parallel LED Array
**********************************************
X1N
– Aluminum Mid Plate
– Monochrome 6″ 050um Screen and its matching acrylic boardn
– Parallel LED Array and mount brackets
**********************************************
X1N-DJ
– Aluminum Mid Plate
– Monochrome 6″ 050um Screen and its matching acrylic boardn
– New mount brackets for existing parallel LED Array
**********************************************
Instructions
- Disassemble. Remove parallel light. Remove mainboard. Remember all the connector locations. Remove Z-axis motor and lead screw (There are 4 screws holding the motor from top of the mid-plate). Remove the mid-plate. During the process, you can keep the touchscreen untouched. Might have to remove the light source’s power converter.
- Install new mid-plate. Assemble everything back. Install existing parallel light with new mounting brackets.
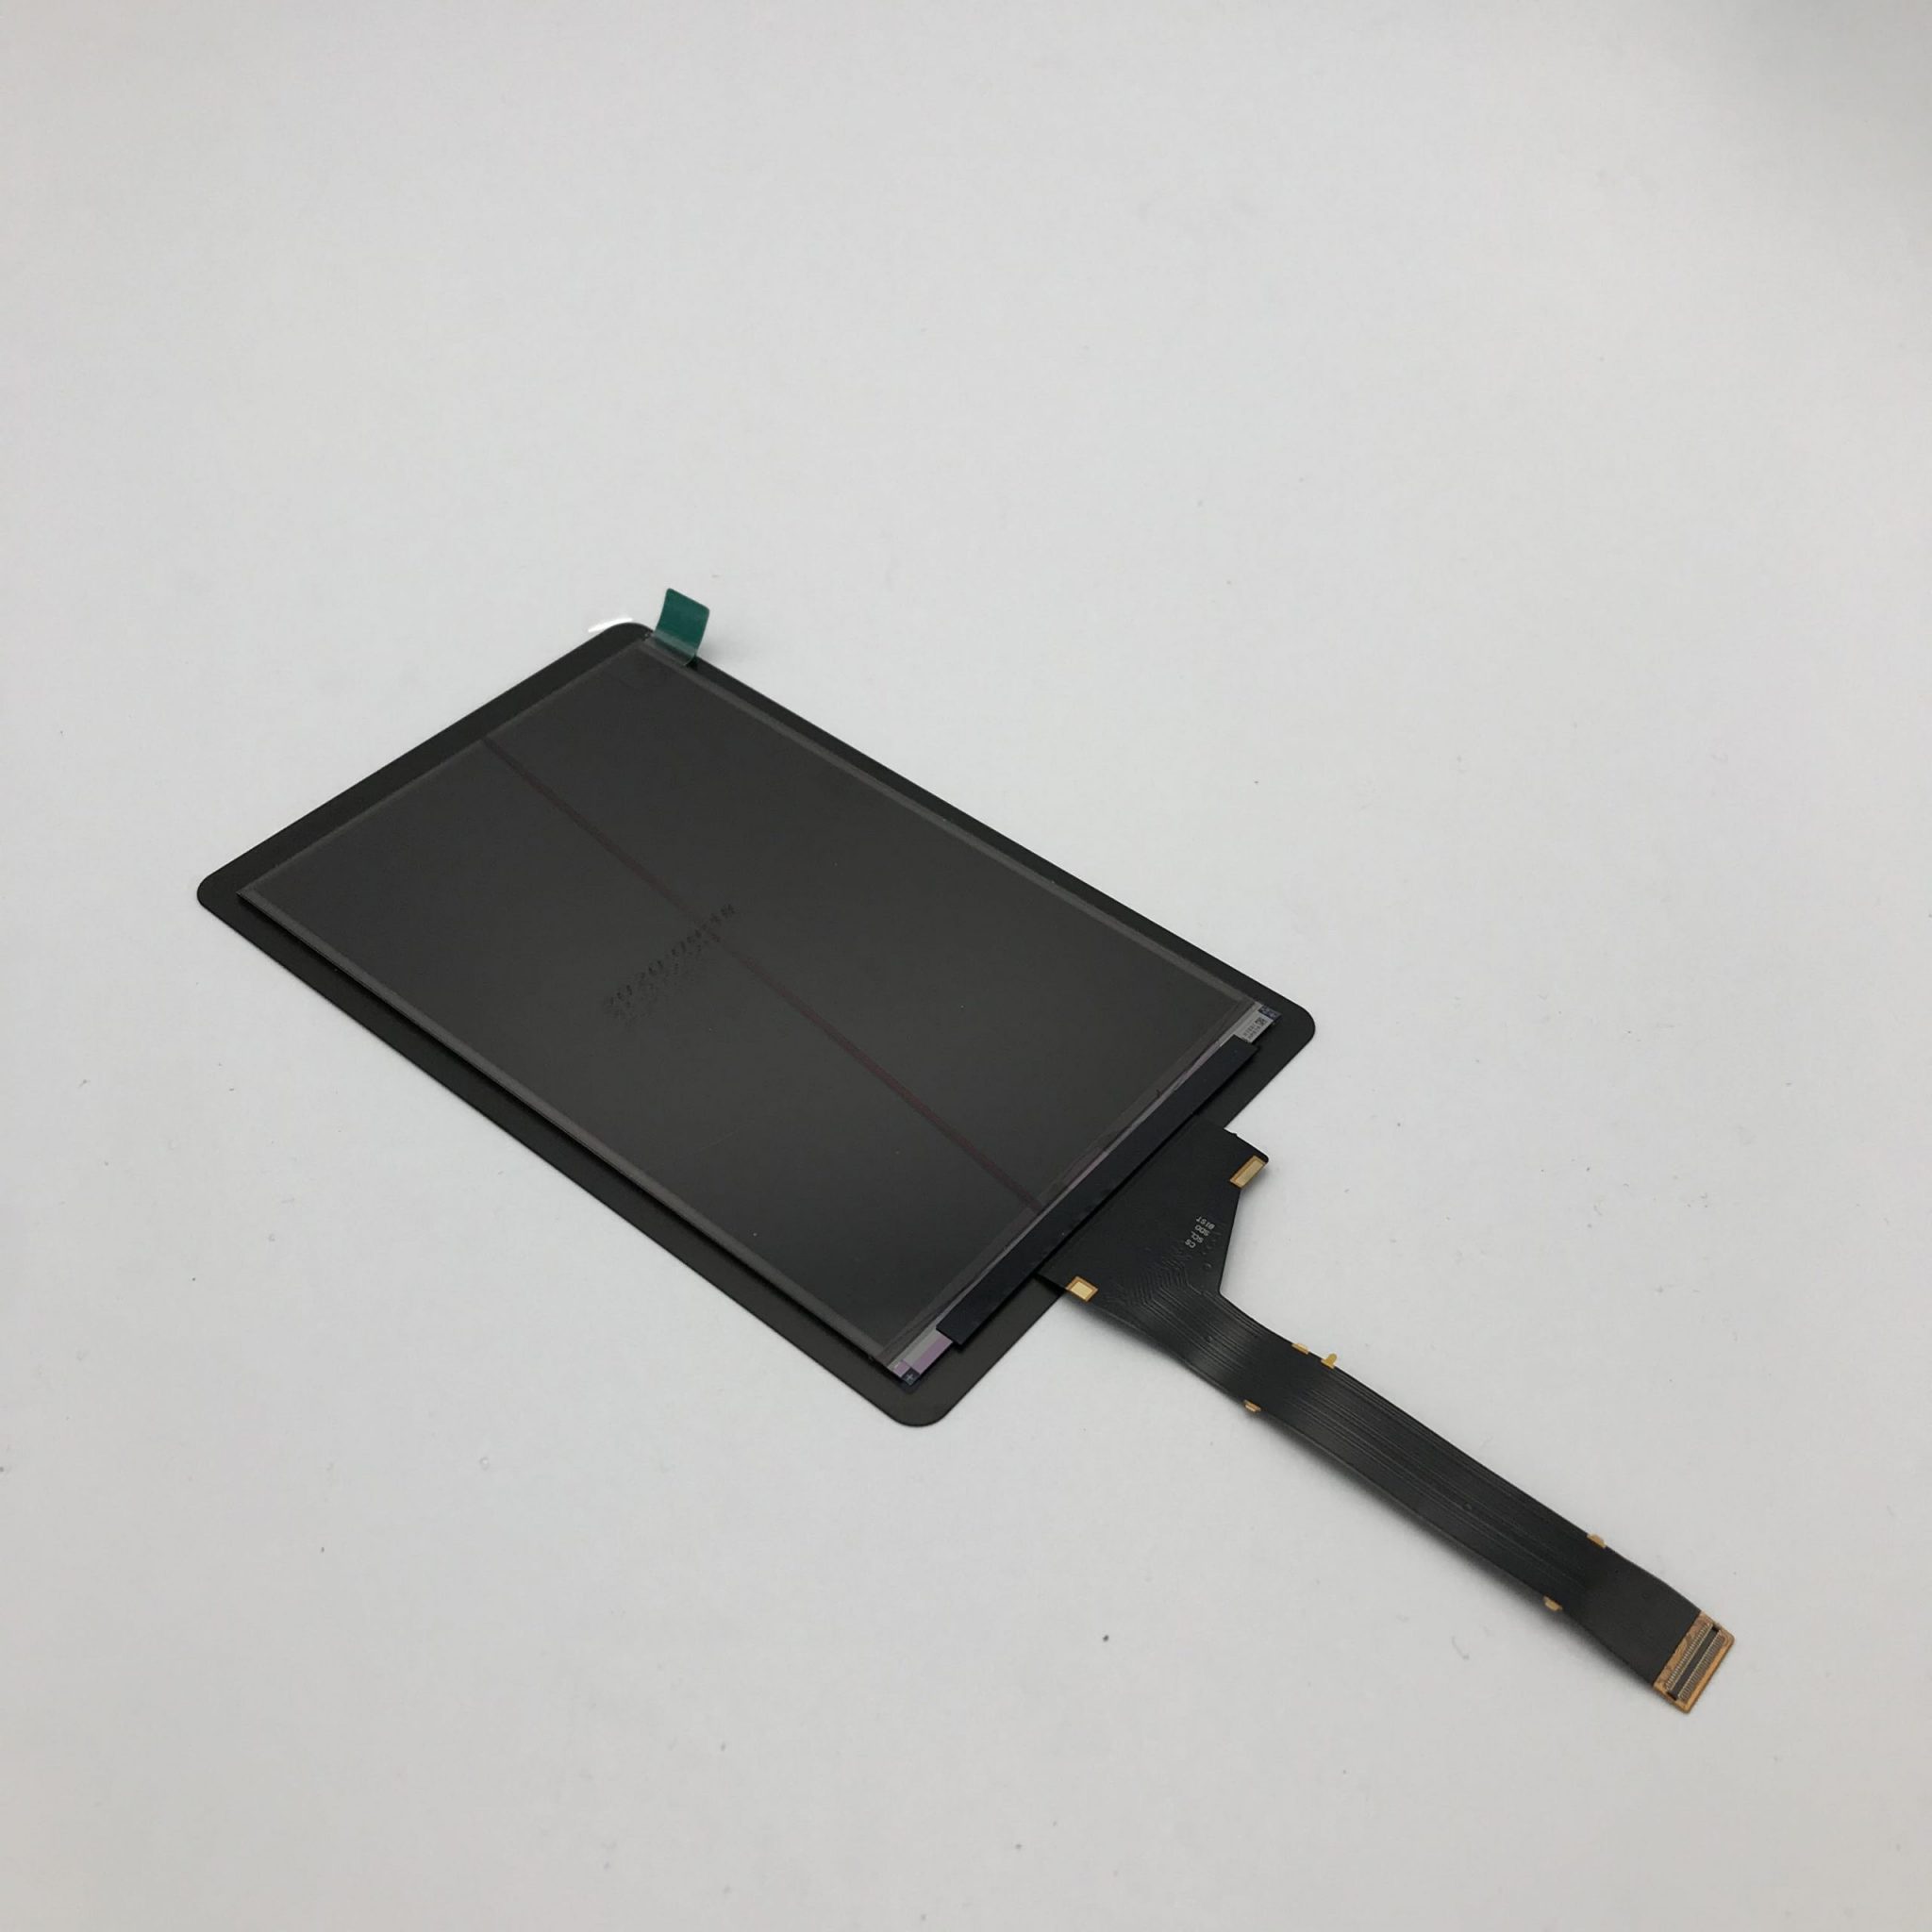
- Install new acrylic board (Removing the protective plastic film on both sides of the acrylic board). Install new 6″ mono screen. Use kapton tape to secure the edges of the LCD screen. You may just use a little tape to temporarily hold the screen in place while assembling. Otherwise, if you lay flat the printer, you might accidentally let the LCD screen drop. Connect the new LCD screen’s MIPI connector to the mainboard using the side window of machine body.
- Check everything. Make sure wires are connected back to mainboard accordingly. Power on the printer and do a square display test.
- Power off and secure everything. Use kapton tape to secure the edges of LCD screen if you have not done so.
- Power on and do a build plate relevel.
Inside the box
- 1*6″2K mono screen
- 1* matching acrylic board under the screen
- 1* mid-plate
- 6″bracket for light
Note
- The kit is only for upgrades from X1-N-DJ to X1-K. It might take 1 hour for you to disassemble and assemble it back. Releveling build plate is always required after installing any new LCD screen.
- You might need to update the firmware for X1-K. ChiTu-firmware-for-6inchmono (Print Update.LCD first. Then the CBD file and then the gcode file. After that, remove the three files from your USB stick. Otherwise, it will serve as first boot priority and load into update mode next time you reboot the printer with USB inserted.)
Support
- Email Epax directly: support@epax3d.com

Reviews
There are no reviews yet.